


Tuesday, October 2, 2012
*Click on tag to view full-sized*
This tutorial was written by me on October 2, 2012.
Any similarities are purely coincidental.
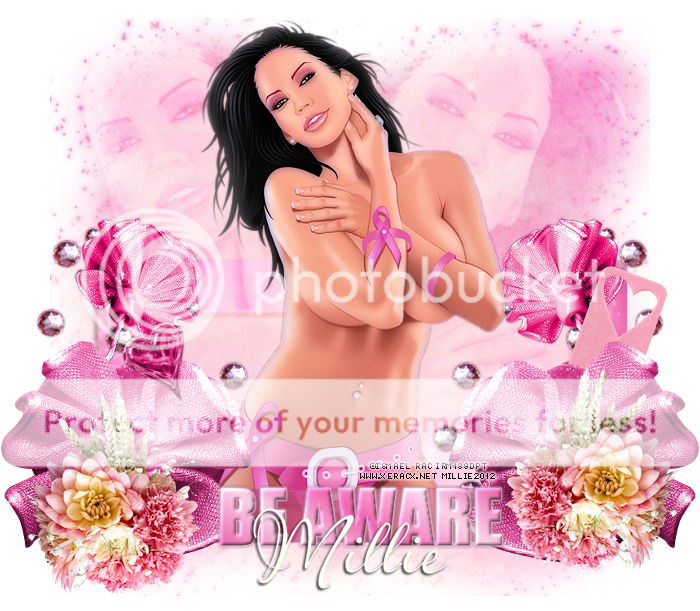
Artist: Ismael Rac - BiancaBCAHD tube
You need a license and purchase before you use this tube.
You can find it in his store HERE.
Mask: Melissaz Creationz Mask 01
Scrapkit: FTU Check Your Chichis Collab by Gimpstastic Tuts
Font - I used Aquarelle
Plugins - Xero porcelain
File - new - 700 x 700 flood fill with white
Open paper6, c/p as a new layer *it wont be as wide as the canvas*
Open tube closeup, c/p paste as a new layer, place to the left at edge of paper
Duplicate tube, image - mirror, merge tubes together
Go to paper layer, select all, float, defloat, invert
Go to tube layer and hit delete - selections - none
Add xero - porcelain default settings to your tubes
Change blend mode to overlay, opacity to 65, merge tubes down on the paper
Apply your mask
Open tube, half-sized tube, c/p as a new layer
Open frame 1, c/p as a new layer, move under tube layer
Move frame down so it touches the bottom of the cut off on the tube
Duplicate frame and move above tube, erase the top of the frame except for the bottom line
The top frame should be covering the tube's legs
Change blend mode of bottom frame to overlay - add drop shadow of 2 -2 75 5.00 2x
and change opacity of top frame to 50
Open flower 5, c/p as new layer, move to the left of frame
Duplicate flower, image - mirror, add light drop shadow
Open flower 3, resize by 50%, adjust - sharpen, c/p as new layer
Move to the left and down a little from flower5
Duplicate layer, image-mirror, add drop shadow to both
Go to frame layer, open flower4, resize by 50%, adjust - sharpen
c/p as a new layer, move to the left, duplicate, image-mirror
add drop shadow to both flowers
Open heart tag, resize by 50%, adjust-sharpen, c/p as new layer
Move tag to the right of the frame and place it as I did mine or how you like best
Go to frame layer, open scatter, resize to 50%, adjust - sharpen, c/p as new layer
Move scatter to the right, duplicate, image - mirror, add drop shadow
Open heart, resize by 50% twice, adjust - sharpen, c/p as a new layer place to your liking
Go to the top layer, with Impact font - all caps, and a gradient from 2 colors in your tube write BE AWARE
Effects - 3dEffects - inner bevel w following settings
Bevel: 2, Width: 5, smoothness 2, depth 2, ambience 2, shininess 2,
angle 315, intensity 50, elevation 30, color: white
Add drop shadow of 2, 2, 50, 5
Move the wording down a bit so its by the tube's legs
Close off background layer, merge visible, add your copyright and your name
Crop your tag to your liking.
Subscribe to:
Post Comments
(Atom)


0 comments:
Post a Comment